Transferring a call to an extension

Hi, in my IVR Design I am transferring to a group of sales agents. If the agents are busy and the user on hold wants to get out of the que and leave a voicemail, how could I do it?

Great question!

You can do this a couple different ways, one is timing out after the transfer and handling the timeout. However, we recommend letting the user press a key on their phone to trigger a voicemail.

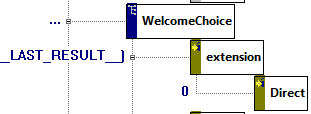
To start, we will have a design that looks like this in IVR Studio:

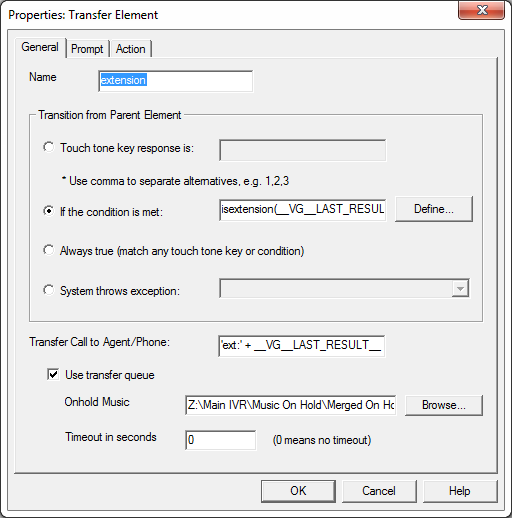
It consists of a choice prompt, two transfer prompts, with two conditions. From the image above, the “WelcomeChoice” prompt will give the user some options. We let the user enter an extension number that then will transfer the call to that extension if it exists as seen below.

Once they are “on hold” or “In que” we then present the user with the option of pressing 0 to leave a voicemail to the party they are on hold for.

The one difference between the two prompts is that the extension prompt is a “queued” transfer compared to a “direct” transfer.

Posted in IVR Usage |

Voicent Workflow System

New to version 9.1.0, Voicent is introducing a workflow system that features full integration with existing Voicent software. With a workflow system in place you will find that it’s much easier to keep track of your customers and stay in constant contact with them through automated follow up communication.

The following is an example description of how a workflow system can work. Workflow systems are created in Voicent’s IVR Studio and the workflow’s progress can be monitored through Call Center Manager. This is just one example, you can create and customize your own workflow system in many different ways to suit your specific needs.

What the Customer sees:

From a customer’s viewpoint, this workflow is very simple. The customer signs up online for a webinar or demonstration by filling out a simple form that includes the customer’s name, email address, phone number, and an “info” text field.
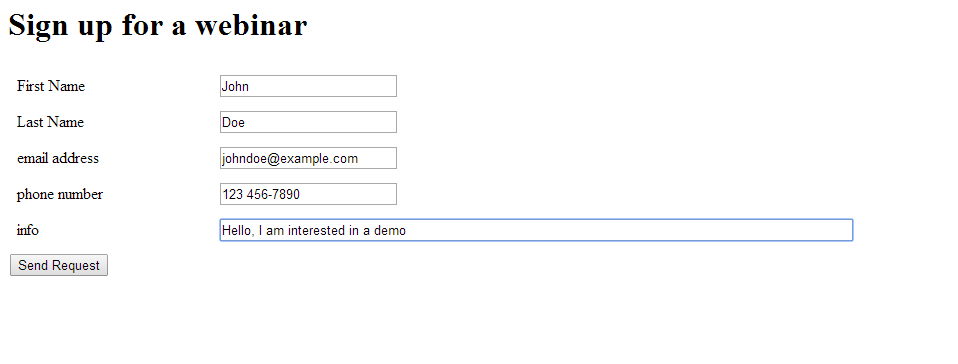
Webinar signup example

Soon after the customer clicks on “Send Request” an email will be sent to the email address specified with the scheduled time for the demonstration: “Please attend a webinar on: 2014-02-28 10:00:00

The customer will also receive a text message notification 15 minutes before the webinar starts: “The webinar will start in 15 minutes.”

What your presenter sees:

After the customer sends the request for a webinar the system will automatically alert a presenter to schedule a webinar through email. This email will include a link to schedule the demo in addition to the customer’s CRM information. If the presenter doesn’t schedule an appointment within an allotted amount of time the system will automatically alert the presenter through text and/or a call.

The presenter can then schedule a webinar. Scheduling the webinar through Voicent’s Dashboard internet browswer (as opposed to your regular browser) will allow the system to include the customer’s CRM information:
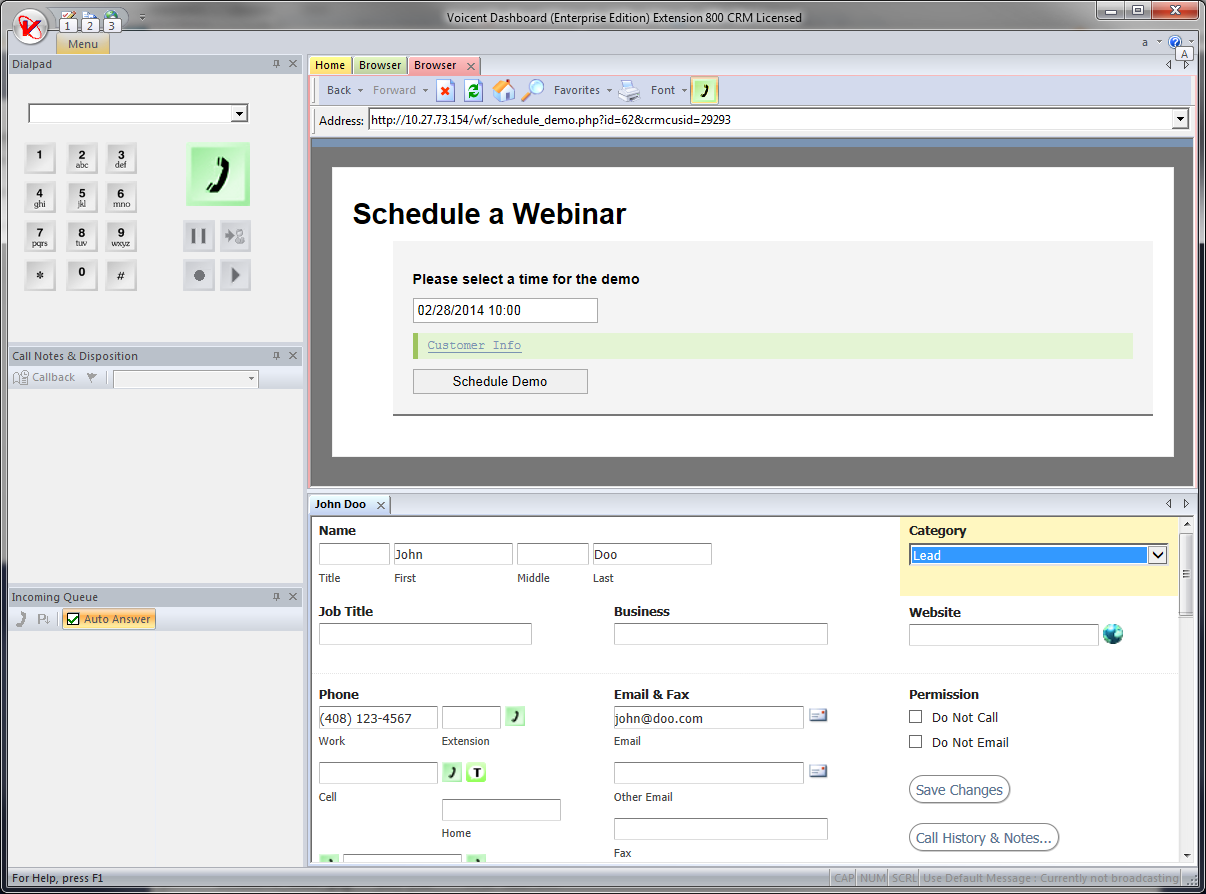
Note that the customer’s category is automatically set as a “Lead” in this workflow. Once scheduled an email will be sent to the customer with the webinar time.

The workflow system’s process step by step:

1. Wait for a customer to submit a webinar sign-up form.

2. Send an email to notify the presenter.

3. Wait for a message notifying the system that the webinar time has been set.

4. If within the allotted time a webinar time is set move on to the next step. If no webinar is scheduled the system will make a phone call to the presenter then it will go back to step three. After another set amount of time, the system will choose the first upcoming webinar and then move on to the next step.

5. Send email to the customer with the scheduled time for the webinar.

6. Schedule a text alert 15 minutes before the start of the webinar to the customer’s phone number.

Posted in IVR Developer, IVR General, IVR Usage, Outbound IVR | Tagged , , ,

A simple two question survey in IVR Studio

For this quick tutorial you will need IVR Studio. This design can be deployed for inbound & outbound calls. This one will be specifically for BroadcastByPhone’s outbound calls.

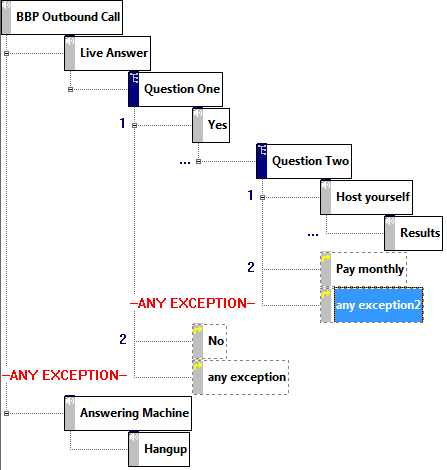
Throughout this tutorial we will be referencing this IVR Design call flow image:

In this tutorial we will be using two variables that we declared in the “BBP Outbound Call” element, variable one will be “Question1″ and variable two will be “Question2″.

As you can see from the above image, the person your calling will start at the “Live Answer” element. The “Live Answer” prompt does not do anything and the caller will first interact with “Question One” choice prompt.

“Question One” being a “Choice Prompt” will ask a simple question with a yes or no response. Under that prompt we have three more elements, the “Yes” prompt element, the “No” goto element, and the “any exception” goto prompt. If the caller presses 1 they will go down the “Yes” path, if they press 2 they will go down the “No” path, if they press a wrong key or input nothing it will go to the “Any exception” path which sends them back to “Question One” to start over.

Lets say we call a client and we get our first question answered, what do we do with the response? In the first “Yes” prompt will be do an action called “set variable value” and we will set the variable “Question1″(we created this earlier in this tutorial) to “Yes”. In the first “No” element, we will do the same action and set “Question1″ to “No”.

If the user select 2 on their touch tone keypad it will trigger the “No” goto element which will set “Question1′s” variable to “No”, then it will proceed to “Question Two” choice prompt.

“Question Two” choice prompt does the same thing, ask a question and store the response in a variable.

That is it for this tutorial, you can do numerous things with your two variables. One example would be to email the results of the survey to you, or have it store the information in a database.

Posted in IVR Usage |