Sample Outbound Survey App

In this article, we introduce the new survey app designer through the following sample survey.

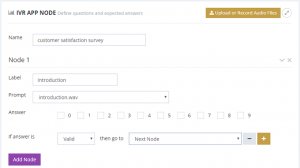
  1. Introduction: thank you for taking our xyz survey.
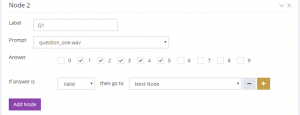
  2. Question 1: how would you rate your overall experience? please enter 1 to 5, with 5 being the most satisfactory.
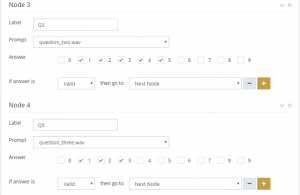
  3. Question 2: how is our response time? please enter 1 to 5, with 5 being the fastest.
  4. Question 3: how likely would you recommend us to your friends? please enter 1 to 3, with 3 being most likely.
  5. End: Thank you for taking the time to finish the survey.

Prepare audio files for the questions

You can create the audio files using telephone recording, using computer generated voice (text-to-speech), or uploading professionally recorded audio files. For this article, we use computer generated voice.

Select from the Setup main menu, then choose Campaign, Audio Files. Click the Generate Audio Using TTS button. Enter the question in the pop up window, then choose a meaningful name for the audio file. In this article, we name them: introduction.wav, question_one.wav, question_two.wav, question_three.wav, and thank_you.wav.

Design the survey App

Select from the Setup main menu, then choose Apps, Survey. Click the Add button to create a new survey.

  1. Enter Introduction
  2. Under the label of Node 1, enter a label like introduction and choose introduction.wav for the question. Leave all numbers under the Answer section unchecked. When no answer is selected, the system plays the audio file listed in the question section, and move on to the next node.

  3. Enter Question 1
  4. Click the Add Node button to add a Node 2 section. Enter the information as follows. Select expected answers 1 to 5 in the Answer section. When some answers are selected, the system plays the audio file prompt and then waits for touch tone key response.

  5. Finish Up the Survey
  6. Add two more nodes for question 2 and question 3. Then add a thank you node similar to the introduction node.

  7. Save the app
  8. Click the Save button at the bottom to save the survey app.

Outbound Survey Campaign

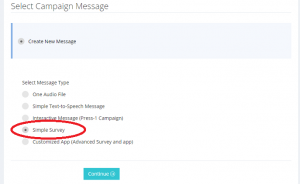
To start a campaign using this survey app, select from the main menu Campaigns, click the Auto Dialer button. In step 2, select Simple Survey as the message type.

Finish the rest of the steps to start the campaign.

Posted in IVR Developer, IVR General, Outbound IVR |

Survey App Designer

In the upcoming 10.8.2 release, a new survey app designer is introduced to reduce the complexity of creating most survey applications. In previous releases, any interactions involve multiple questions require using Voicent IVR Studio, which is a full developers tool with support for database access, email and website and integrations. Though the tool is not that difficult to use, but it does require some learning time.

However, many survey applications do not need the full back end programming support. The new survey app designer eliminate the need for the additional tool, thus greatly reduces the complexity. The interface is intuitive and requires almost no learning. If you are using our cloud platform, the new designer is available in the basic subscription plan. If you use our on-premise software, you would need IVR Studio license.

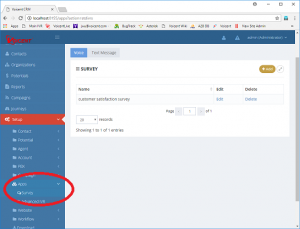
The survey app designer can be accessed from the main menu under Setup, Apps, Survey.

Posted in IVR Usage |

Sample IVR app that uses database actions

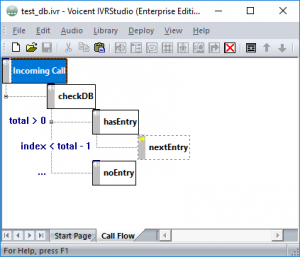
This article tries to explain how to use the built-in database action in Voicent IVR Studio through a simple sample app. The following figure shows the call flow.

For an incoming call, the app first checks a database table and find all entries. If the total number of entries is greater than 0, then it reads back each entry one-by-one. If there is no entry, it informs the caller.

Setup Database

In this sample, we use mysql database engine. First we create a database named test, then we create a table named test. It does not matter what how you define the table as long as you have a column called name. A sample table could look like the following:

id name phone
100 Mike 4081112222
101 Mary 4081113333

Setup JDBC Driver

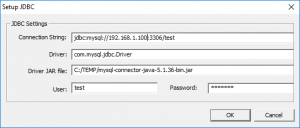
Select the root element “Incoming Call”, right click on properties…, then click the Setup JDBC… button.

Make sure you choose the correct JDBC connection string and other info for your application.

Setup Variables

From the same root element’s property window, select the Variable tab. Add the following 4 variables as follows:

Name initial Value Comment
rc jsoninit() The variable to hold the database query result
entry jsoninit() The variable to hold one row of the query
total 0 The total number of entries returned
index 0 Loop variable to go through the query result

The result of a database query is saved in a JSON array. In this case, variable rc is used to hold the value. To initialize a JSON variable, use jsoninit().

The Database Action

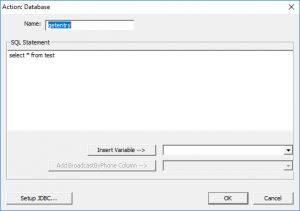
In this sample, we use a simple select all statement from the test table.

The result is then saved in the variable rc by using a setvar action, rc = getentry, where getentry is the name of the database action.

Check Total Rows Returned

We use the built-in function jsonsize to check the total rows returned. To make it easier to later actions, we assign the result to a variable total, where total = jsonsize(rc).

Get One Specific Row

To get a specific row, use the array format. For this example, we use the setvar action to set entry = rc[index]. You can then access the name column by entry.name notation.

The Sample IVR App

The sample app can be download here: IVR Database Action Sample.

Posted in IVR Developer, IVR Usage |