
Share This Post:
Run Your First Auto Dialer Campaign
This tutorial goes over how to run a simple text-to-speech Auto Dialer campaign. In order to run an Auto Dialer campaign, you’ll need to do these steps:
- Sign Up for Callcentric
- Install Voicent Software
- Add Yourself as a Contact
- Design a Simple Text-to-Speech Message
- Run an Auto Dialer Campaign
{1} Sign Up for Callcentric
In order to make calls with Voicent Software, you’ll need a VOIP service. Signing up for the Callcentric VOIP service is easy and quick. Simply head over to the Callcentric Website and then fill out the New Customer form. Once you’ve created your account, they will provide you with a set of user credentials that allows you to make calls through software like the Agent Dashboard.
After you’ve done these steps, you’ll be able to start your Auto Dialer campaign. So, let’s begin with how to add yourself as a contact.
{2} Install Voicent Software
Once you’ve acquired the Callcentric credentials listed above, you can install Voicent software. You’ll want to run the Phone Setup Wizard (under the Setup menu in the Voicent App), and select the VOIP provider option when the time comes (specify Callcentric when the system prompts you for your provider). This wizard will automatically configure Voicent software for usage with Callcentric.
Once you’ve entered the credentials into Voicent software, the Voicent App should start without any problems.
{3} Add Yourself to Contacts
First, go to Contacts. Click on Add.
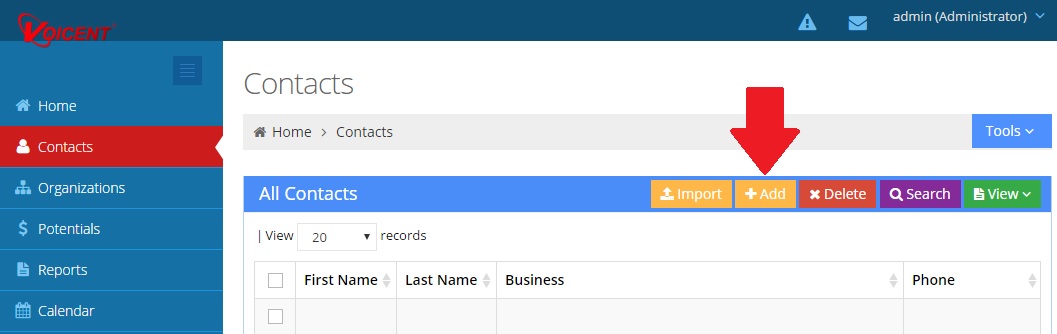
Fill out the form you are taken to with your personal contact information. It doesn’t matter what you put in the fields, except make sure to put your own phone number so that you receive the call we’ll be making soon.

Now that you’ve added your personal information to the form, click save. We will now go over how to make a simple text-to-speech message.
Note: at this point you can also choose to upload a list of contacts to use in this test campaign. Simply go to Contacts, click Import, and then follow the import wizard.
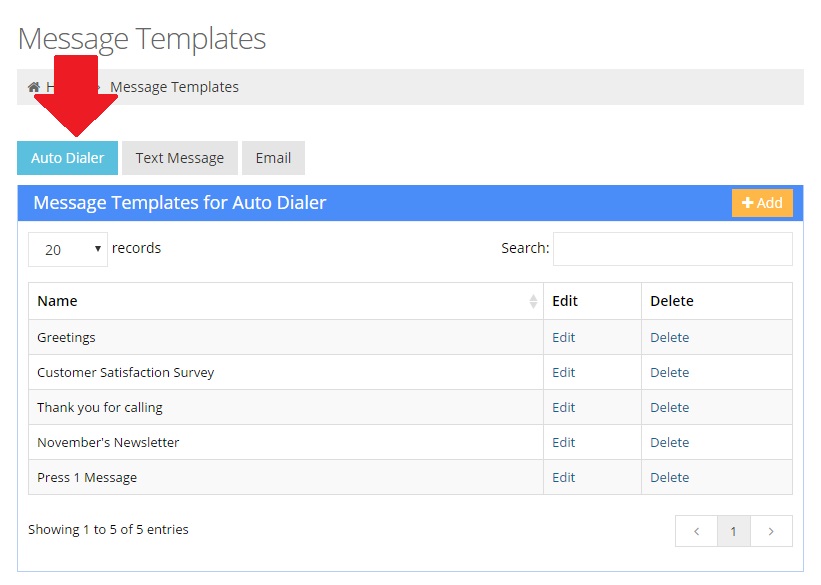
{4} Design a Simple Text-to-Speech Message
First things first, go to Setup > Campaign > Message. Click on Auto Dialer.
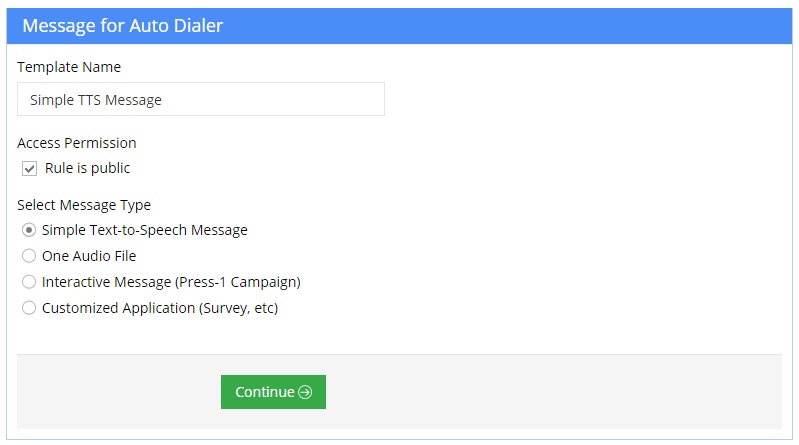
Now you’ll give the Auto Dialer message a name and select the type. In this case the type will be a simple Text-to-Speech message.
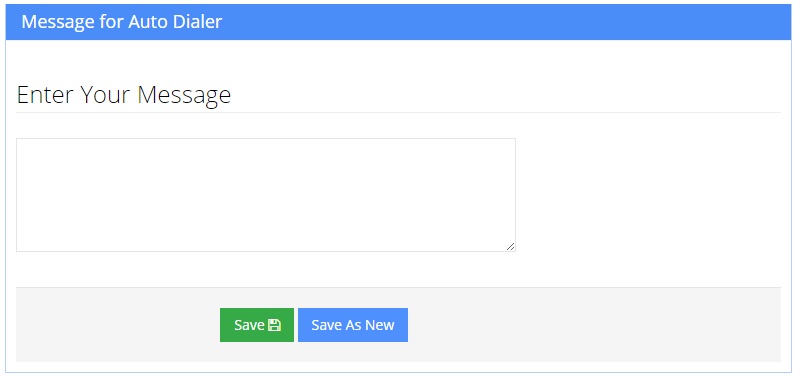
Now simply enter your message into the blank text field, and then click save when you are done.
{5} Run an Auto Dialer Campaign
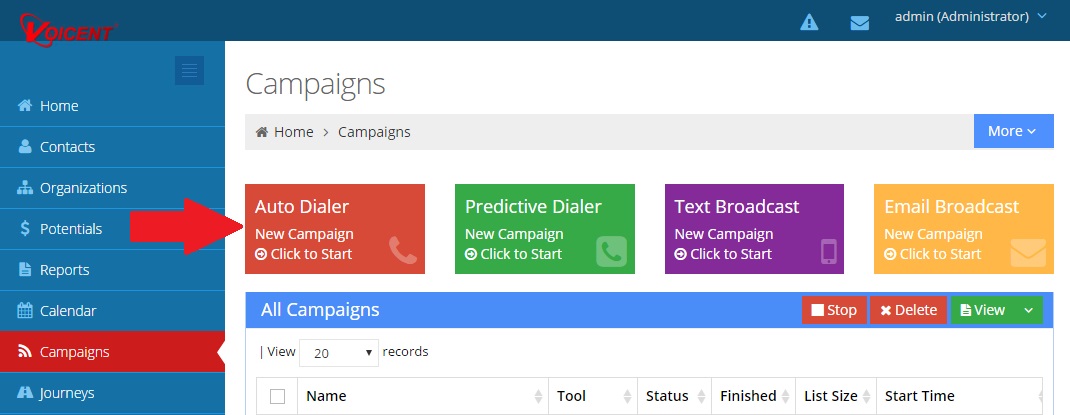
The last part of this tutorial explains how to actually create your Auto Dialer Campaign. Now that we have the two necessary parts to continue (a contact to call, and a message to play during the call) we can being the Auto Dialer Campaign Wizard. To begin, go to Campaigns and click Auto Dialer.
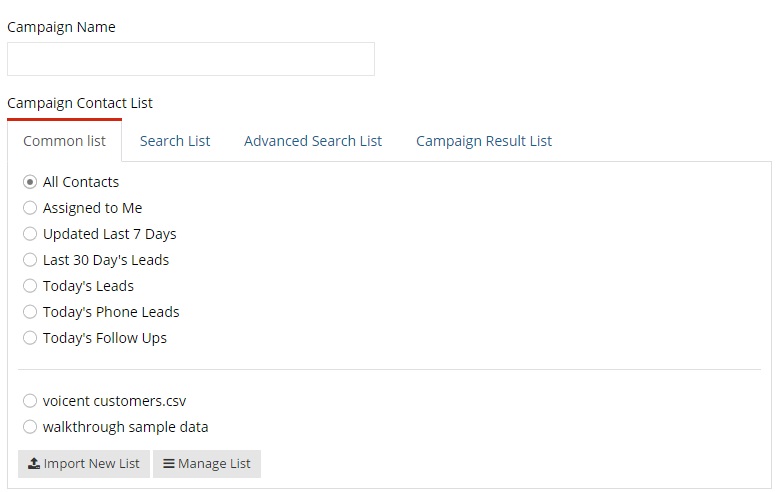
Now we have to give the campaign a name, and select the contacts we’ll be reaching out to. For now, since you are the only contact in the system, we can just select All Contacts.
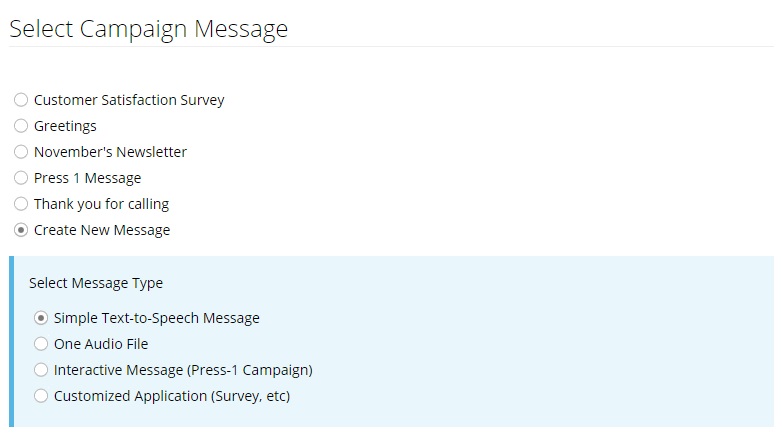
After selecting the contacts to call, we need to select the message to play to them.
You can create a new one, but for this example you should select the one created in the previous step.
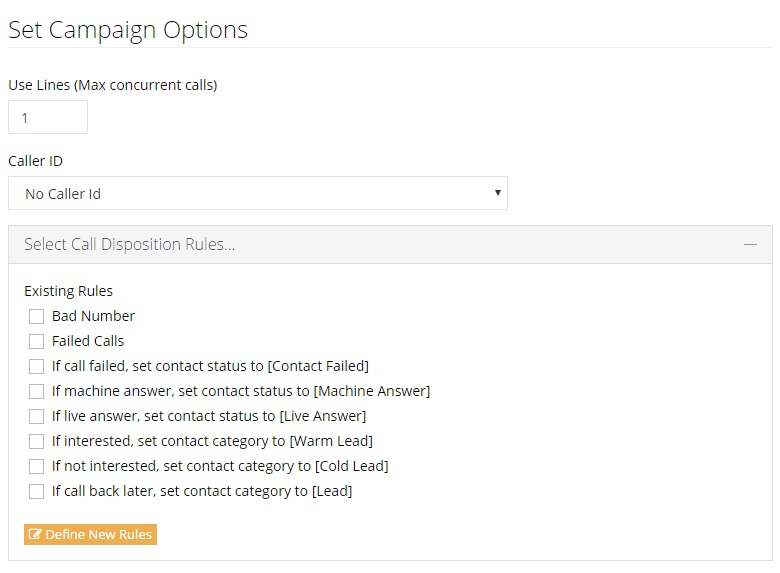
After selecting the message you created in the previous step, you’ll be taken to the campaign options page. This is where you can specify the number of lines, set caller ID, and turn on any automatic call disposition rules you would like to use.
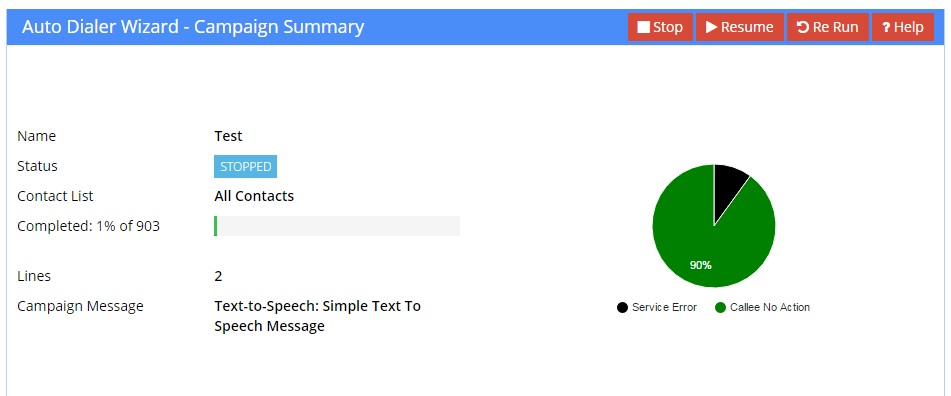
After you choose these options, then you’ll be ready to launch your campaign. Once you click continue, you should be taken to the campaign detail page that looks like the picture below:
Now that you’ve created your first Auto Dialer campaign, you should try creating an
interactive message. Interactive messages allow the user to press 0-9 to perform an action, like speaking to a salesperson, or recording a message.
Share This Post: