
IVR Studio: Inbound IVR
Anyone involved in business communications today is familiar with auto attendants, and businesses both large and small can easily take advantage of the technology. When a call is answered by Auto-attendant, prerecorded voice messages are played to the caller offering them a menu of choices for directing their call. "Welcome to ACME Company. For sales press 1, for service press 2, to speak to our operator press 0". Once the caller has made their choice, the call is routed to the appropriate ringing extension, where they will be connected to the called party, or presented with yet another series of choices.
This sample is also captured in the following video demo:
The Call Flow
The call flow is straightforward for auto-attendant applications. It consists of one Choice Element and a few Call Transfer Elements. A Choice element is used to present a caller with choices or a menu. A Call transfer element causes the current call to be transferred to another phone number, or transfer using the same line and pop up an alert window on a computer.
You can open this design by selecting Library > Auto-Attendant from the program main menu.

Setup menu prompt
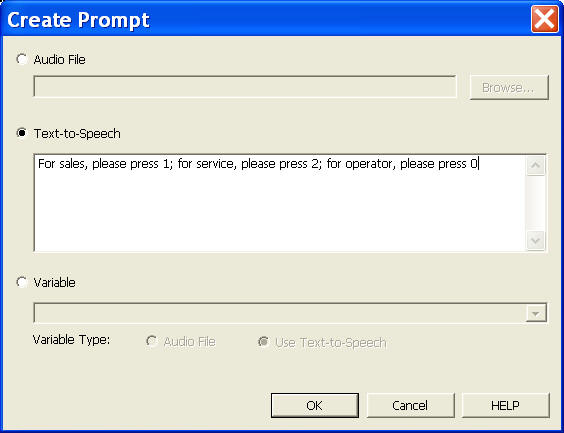
The choice element (Main Menu element in the call flow diagram) usually requires audio message to prompt a caller to press certain keys. You can use three types of prompts:
1. Pre-recorded audio files
The format of the audio file needs to be: PCM 8KHz, 16 bit, mono. This format is the global standard for telephone communications. For more information about audio, please see Audio Quality and Recording FAQ.
2. Text using text-to-speech
You need Voicent Text-to-Speech PlugIn for automatic voice generation. You can use any TTS engine/voice with the PlugIn.
3. Variable: either audio file or text
The variables are dynamic generated items, such as a caller input of credit card number. These items are usually collected during run time.
To set the prompt for an element, right mouse click on an element, then choose Properties... from the popup menu. Click the Prompt tab, then click the New... button.
Deployment
You can use the sample application as is. To deploy the application, select Deploy > Submit to Gateway... from the program main menu. If the menu item is grayed out, select Validate... first.
If you have multiple IVR application deployed, please see IVR select application for more information.
Once deployed, restart the gateway to have the changes to take effect.
When an incoming call is answered by the gateway, the application will execute the transfer element. A popup window will be displayed on your computer screen. If you have Enterprise Edition, you can have the window popup on a any computer. The caller will hear your on hold message. If the on hold message is finished before the call is answered by a human, it will play the message again.
To answer the call, pickup the phone that is connected to the same modem phone line, click the ANSWER button on the popup window. When done, click the Release button.